 3 Easy steps to fit Rapid Drip Former:-
Step 1
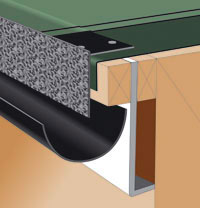
Lay 1st layer of felt trimming felt at the edge of the drip batten. Allow the felt to be turned over the facing edge of the drip batten.
Step 2
Simply fix the Rapid Drip Formers to the decking using 20mm galvanised fixings through the pre-holed edge leaving a 3mm expansion gap between the end of each drip. Rapid Drip Formers will slot together on either end to provide a neat finish to the front edge. Cut Rapid Drip to length as required using a angle grinder. Always over lap the end of the cut drip with a whole drip to form a neat finish.
Step 3
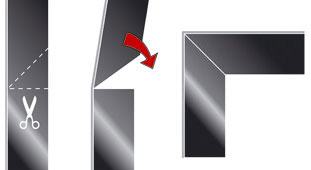
Rapid Drip Formers can simply be cut and bent around corners as necessary (see Fig.1 above). Lay 2nd and 3rd layers of felt cutting the felt off neatly at the pre-formed upstand of the Rapid Drip Former. Using a straight edge is recommended.
Fig.1 Cutting product for a corner